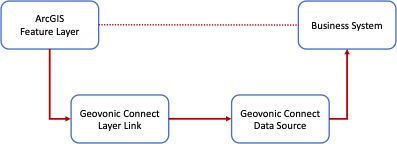
The Geovonic Connect admin console is used to configure connections between your ArcGIS layers and related business systems. There are two key concepts to understand when configuring relationships between layers and your business systems.
- Data Source – A data source is a description of the type of business system you are connecting to, and properties required to connect to the business system. For example, if you are connecting to an SQL database the properties might include the host address, username, and password.
- Layer Link – A layer link describes the relationship between features in your ArcGIS feature layer and records in your business system. The layer link is able to retrieve data from a data source based on attributes or spatial information about the selected features.
Data sources are reusable are across multiple layer links. The same layer link can be used in multiple mapping applications.
Data Sources
A data source represents a connection to a business system. For example, a data source can be configured that allows Geovonic Connect to connect to your asset management system.
To add a new data source, first provide a unique name that describes the business system you are connecting to, and then select the type of application (e.g. database or TechOne).
Each data source also includes a collection of properties that are specific to the connection type. Once the connection type has been selected, the form will update to show these connection-specific fields.
Note: your data source settings panel will look different based on the connection type you have selected. The above screenshot is included as an example only.
Once you have completed all fields on the form click on “Test connection” to validate that the server can be reached, and the settings are correct. Finally, click “Save” to finish. The newly added data source will now be available to use.
It is important when configuring a data source to follow the Principle of Least Privilege.
Any credentials provided to the data source (e.g. database username/password) should only be able to access the minimum amount of information to meet the needs of your Geovonic Connect widget. For example, do not provide the admin credentials for your database if Geovonic Connect only needs to access a single table. Create a new user with the least required privileges.
- Firewall ProxyIf your business system is sitting behind a firewall, you will need to install the Geovonic Relay Service. Select the “Use firewall proxy” checkbox to tell Geovonic Connect to connect to the data source using the relay service. The relay service must be up and running before you can test and save the new data source.
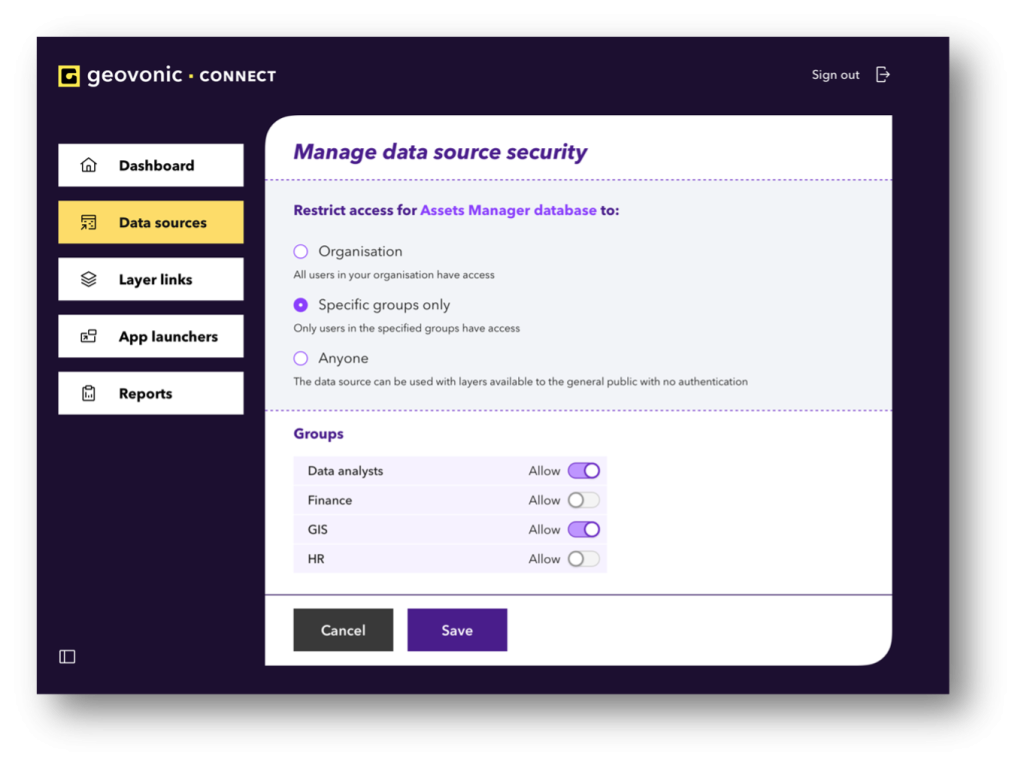
- Security SettingsBy default, when a new data source is added, the data source can be included in web maps for any authenticated ArcGIS user in your organisation. Geovonic Connect allows for more granular security settings by restricting access only to certain groups.
To restrict access to a data source to only a limited number of ArcGIS groups, click on the “Manage security” button on the data source settings page. From here you can change the security of the data source.
Be very careful if selecting the “Anyone” option.
This means that there is no authentication required to access the data source. This should only be used when connecting Geovonic Connect to publicly available data.
Layer Links
A layer link represents a relationship between an ArcGIS feature layer and records contained in your business systems. For example, a feature in your properties layer might be connected to a rating record in your ERP system.
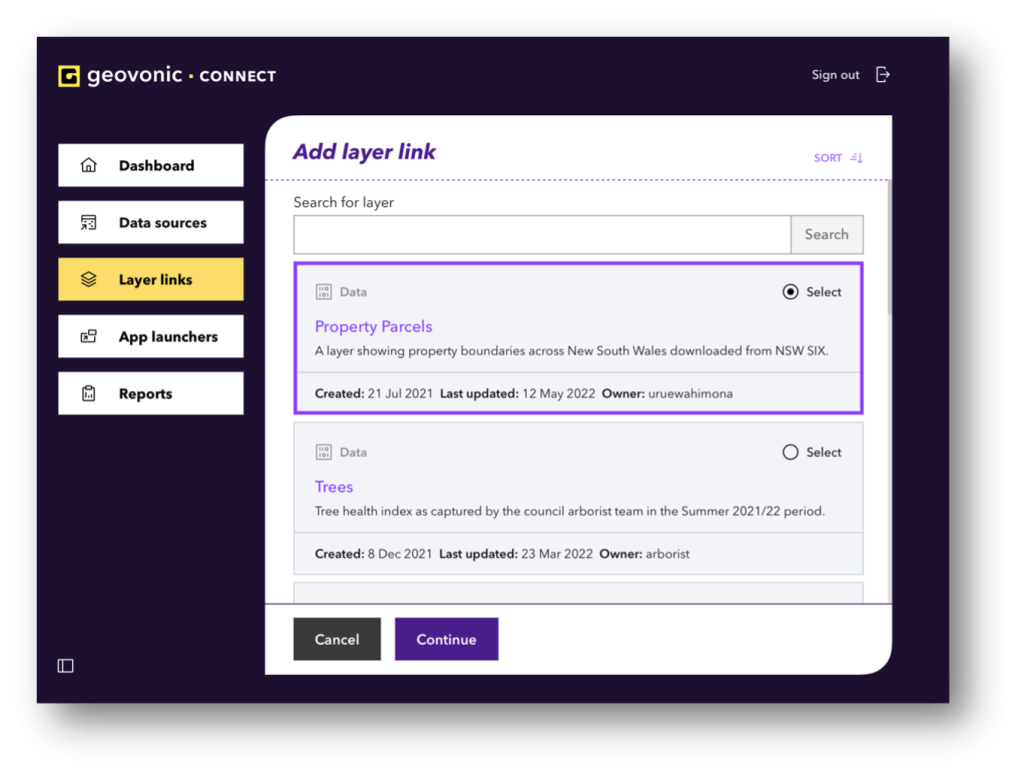
To add a layer link you must first start by searching for a feature layer in your ArcGIS content. Enter a search phrase to reveal a list of matching layers. Select the layer for which you want to define the layer link.
Once the layer has been selected, the next step is to select the data source (defined in section 3.1) that you wish to link the layer to. You are also required to give your layer link a unique name that describes this relationship. The layer link’s name will be displayed to your end users when viewing related records.
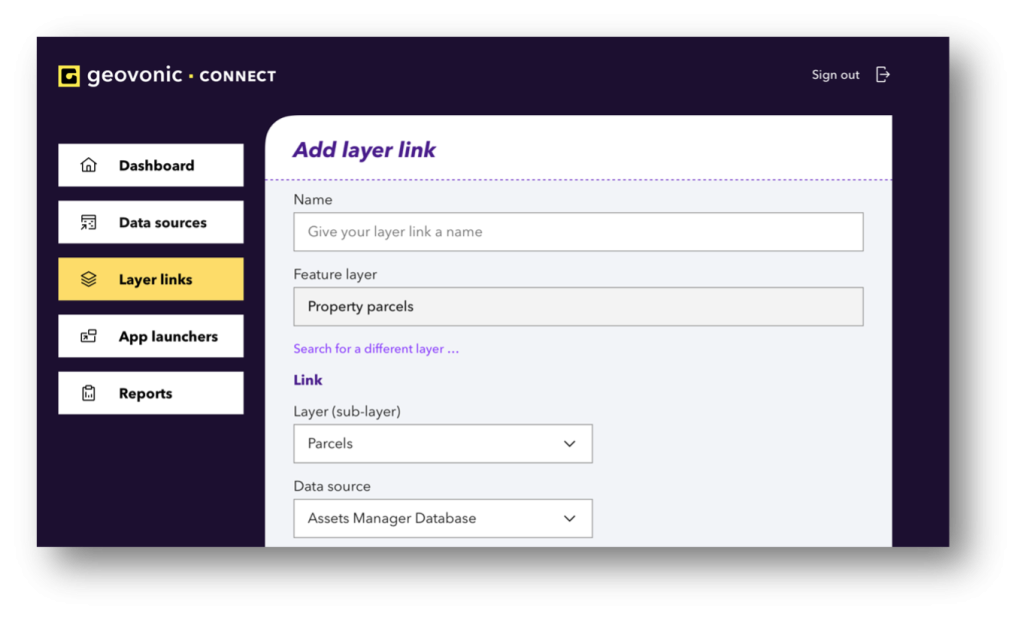
After selecting the data source, an additional set of properties will be displayed that are specific to the data source. For example, if connecting to a SQL database the layer link properties might be the query that will be executed to fetch data relating to your selected map features.
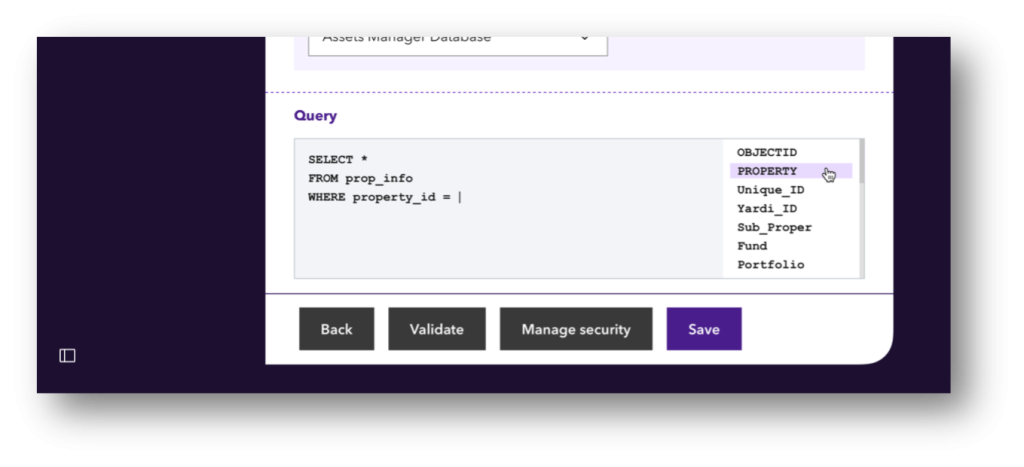
Clicking on the “Validate” button will test your layer link properties to make sure they will work OK when used from the widget. Once you have finished configuring the layer link, click on the “Save” button.
- Security SettingsBy default, when a new layer link is added, the layer link security settings will be inherited from the chosen data source You can further restrict access to this layer link by choosing the “Manage security” option. A layer link cannot have security settings that are more open than the associated data source.
Once your layer link has been defined, it will be immediately available to use through the Geovonic Connect widget in your web mapping applications.
